
Looking for Answers?
Browse our articles to find the answers you need
QA Requirements
To guarantee a smooth QA, please execute each item in the QA checklist to ensure merchants experience your expected results. Be sure to add the results of your own QA to the Status tab.
About Testing Sites:
The onboarding checklist should be executed using ONE site only. The site submitted for QA review should include all the use cases in this article.
For your own testing, you can have as many testing sites as needed.
Payment Provider Account Details
We need to know what are the credentials of the payment account you are going to use while testing all the case scenarios.
- Live Account
- Testing Account (Sandbox)
Case Scenario: Onboarding / Connect Flow to Wix
In order to QA the onboarding of existing accounts and what is the flow our merchant will experience, you need to test the successful and unsuccessful onboarding connect flow.
1. Test the Successful Account Connection to Wix
Enter valid provide credentials and try to connect.
To verify connection:
- Visit Wix.com
- Click Manage Site
- Click Settings
- Go to the Accept Payments tab
- Connect your Provider
If your provider is successfully connected, you will see:
credentials: {
merchant_id
merchant_key
merchant_salt
},
accountId,
mode: live/sandbox:
2. Test the Unsuccessful Account Connection to Wix
Enter invalid provide credentials and try to connect.
To verify connection:
- Visit Wix.com
- Click Manage Site
- Click Settings
- Go to the Accept Payments tab
- Connect your Provider
If your provider is unsuccessfully connected, you will see:
reasonCode: 2000
errorCode: 105
errorMessage: Merchant_account_is_not_active
errorCode: 105
errorMessage: Merchant_account_is_not_active
3. Test the Create New account through Wix
Choose your Payment Provider from the testing site and create a new account using the sign up link you previously provided
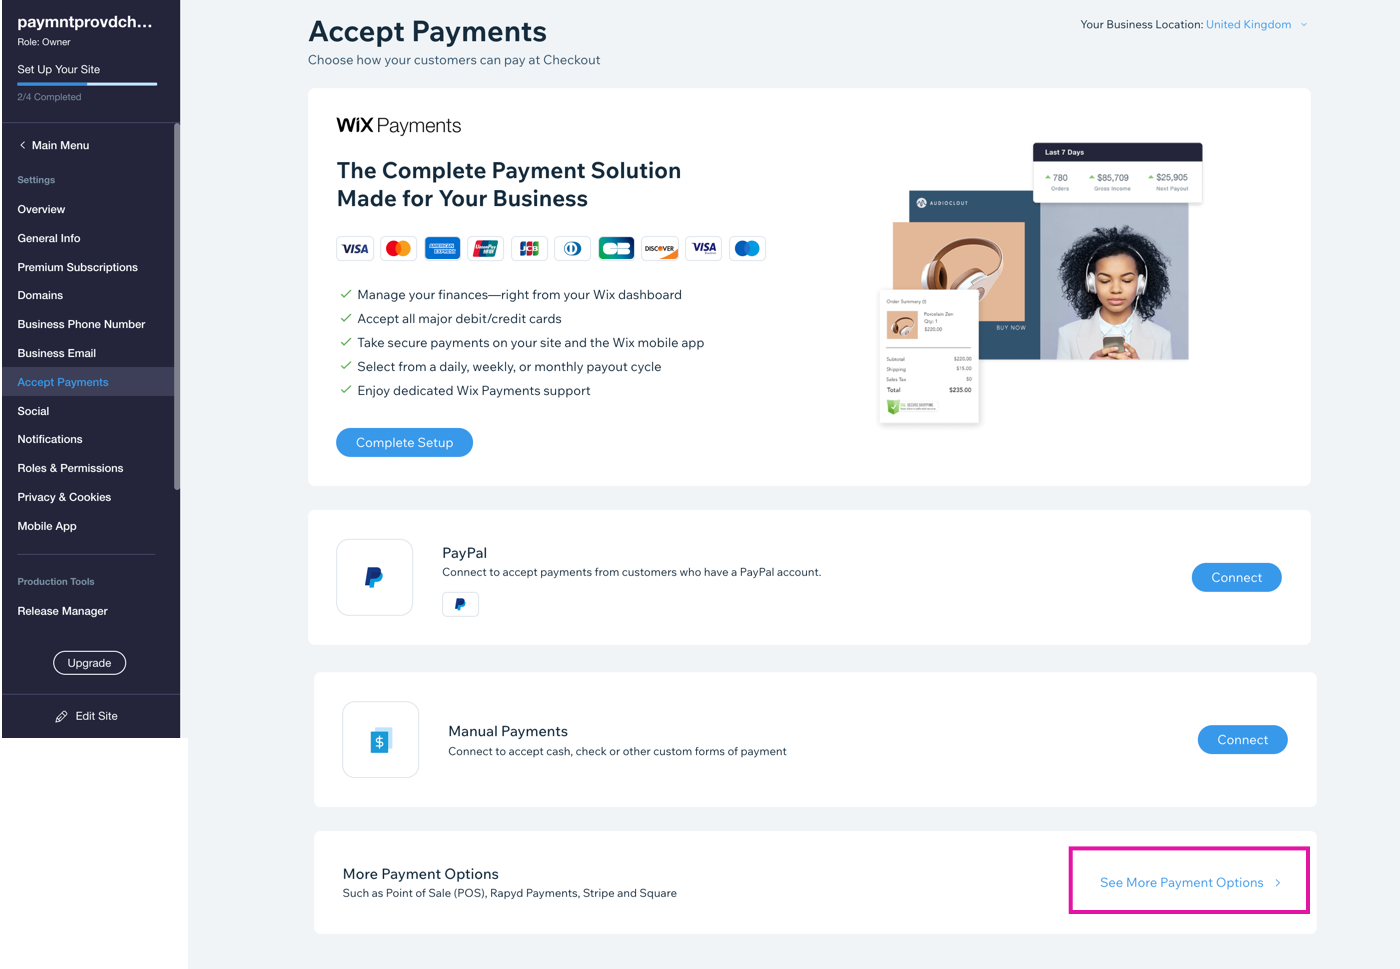
To choose your payment methods:
- Go to Accept Payments on your site's dashboard.
- Scroll down to the area "More Payment Options" and click See More Payment Options.
- Choose your Payment Provider from the list and click Connect.
- From the payment provider / payment method page, click on "Create a new account"
- Follow the instructions and create a new account with your payment provider / payment method.
4. Test the Support Link
Merchants use this link to contact your provider when they need any support or assistance.
- Click Create Account
- For more information, contact <Provider> Support button.

Case Scenario: Test the checkout/sale flow - Wallet / Like (Redirect) Providers
How to verify the checkout and sale flow:
- Visit your published site URL
- Select a product and execute a buy
Premium Plan
To start accepting payments on your testing site, it's necessary to have a premium plan connected to the site. Contact us to grant you a free plan for the purpose.
Checkout - Sale Flow
A merchant could or could not successfully sell a product or service using a payment method connected by your provider.
How to verify a transaction:
- Visit Wix.com
- Click Manage Site
- Click Finances
- Click Payments
1. Successful Transactions
- Visit your published site URL
- Select a product and execute a buy
If the transaction status is “SUCCEEDED”, you will see the correct information as part of the transaction details (like "Customer info", "Payment Method" etc.) and will be displayed in the following way:
Transaction ID: 877ae60a-894e-4728-9810-32a9b2d13032
status: APPROVED
reasonCode: 0
pluginTransactionId: 3ced9a05b40b49f8b4395c70e0bcc505
amount: 1.00 TL
2. Declined Transaction - Synchronous flow:
Example of decline reason: "Currency is not supported"
If a transaction status is “DECLINED” due to "Currency is not supported", you will see the following information:
TransactionID: ed381b57-06b7-4323-9d18-924502e1f7d1
PluginTransactionId: 50cc1d15160943bba71acd56d6784a9c
-----------------------------------------------
status: DECLINED
reasonCode: 3003
If a transaction status is “DECLINED” due to the customer’s currency not being supported, you will see the following information:
3. Declined transaction - Asynchronous flow
Example of decline reason: "Insufficient Funds"
If a transaction status is “DECLINED” due to "Insufficient Funds" you will see the following information:
TransactionID: f6658622-1aba-4b0b-a12f-97e0f00ecdac
PluginTransactionId: 60668047a371452f99aeb9fca4a974b5
-----------------------------------------------
status: DECLINED
reasonCode: 3000
4. Canceled Transactions
In this scenario the User cancels the checkout flow on the provider’s side.
If a transaction status is “DECLINED” because the User cancels the checkout flow on the provider’s side, you will see the following information:
TransactionId: 67dfb44b-c4c0-4da4-a170-4e1d42f2ac6a
PluginTransactionId: 5f201bd956fcb1114646523 or 162c66e082194e179580461e1ebb308d
-----------------------------------------------
status: CANCELED
reasonCode: 3035
5. Partially Refunded transaction
In this scenario, the User is refunding part of the transaction amount from the Provider's side.
If a transaction status is “DECLINED” because the user is refunding part of the transaction amount from the Provider's side, you will see the following information:
TransactionId: f6658622-1aba-4b0b-a12f-97e0f00ecdac
PluginTransactionId: 67668047a371452f99aeb9fca4a974b5 -
----------------------------------------------
status: PARTIALLY REFUNDED
reasonCode: 0
amount:
amount:
6. Refunded Transaction
In this scenario, the User is refunding the whole transaction amount from the Provider's side.
If a transaction status is “DECLINED” because the user is refunding the transaction fully on the Provider's side, you will see the following information:
TransactionId: 9d23a300-98c9-4213-bd24-5b56846ccd19
PluginTransactionId: 3c96f128ef2a4298a3e87399a42e9a66
------------------------------------------------
status: REFUNDED
reasonCode: 0
amount:
amount:
7. Chargeback
In this scenario, you will need to display a transaction as chargeback, similar as if the buyer initiated a dispute.
If a transaction status is “Chargeback” because the user is disputing the transaction or part of the transaction you will see the following information:
status: CHARGEBACK
Was this article helpful?
